More than a decade ago, I made this post about how to fix a NES that doesn’t want to boot games anymore for my old blog. That blog hasn’t been online since probably 2008, but I recently found the pictures from the tutorial, and thanks to the Wayback Machine, I was able to recover the tutorial. The tutorial was quite popular back in the day, I remember it getting picked up by HackaDay which basically DDoSed my 500 MHz Celeron web server for a couple of weeks. 🙂
Here follows a slightly edited version of the guide, hope you like it!
In this article I’m going to describe the various faults concerning the Nintendo Entertainment System (NES), why they appear, and how to fix them.
Many geeks are addicted to 8-bit games. I myself are one of them. Sadly, I’m the oldest child in my family, and I was born a bit to late to be able to grow up with the NES. And since the computers already dominated our household when I was born (my mom worked as a software developer/tester) I most naturally became quite fond of them. So I never had any console-games as a kid.
But since one of my friends is a Nintendo-addict, I got hooked in the later years of my life. I still blame him for that, he’s actually the bastard who sold me my first NES, about a year ago [which would be 12 years ago by now].
The only problem was that the bloody NES wasn’t working, When switched on, it just blinked repeatedly on and off at about 1 Hz. Some sites suggested that it was the connector that was getting old, I got one, and it didn’t fix it. So, in Aug. 2006 a bought a second one, this time in working, but a bit shabby state. I even got a free game, which the seller accidentally forgot in the NES. Anyway, I smacked in the connector I bought for my other NES, cleaned the cartridge and voilá, a fully working system.
Now, what has all of this got to do with this article. Well, almost nothing, except the fact that there aren’t any really good guides on the ‘net on how to get a NES going. I believe that the main reason is the fact that people don’t really bother figuring out how the thing works. And that the there are two common problems going under the same title, the “blinking NES”-problem. Sometimes it refers to blinking games, sometimes to the problem I had. So no one hasn’t got a clue on what might be wrong. Well, I’m going to straighten this whole mess out in this article.
First, let’s look at my problem, and what causes it. (Scroll down if you don’t want to read why, just how)
The NES has a protection system often referred to as the “lockout”-chip. This system actually contains of two chips, one big inside the NES, the lockout-chip, and a small one in the cartridge, I’m going to call it the code chip. The purpose of these chips was to make sure that the game makers payed a license to Nintendo. How it works is like this, a cartridge is inserted into the NES. The lockout-chip connects to the code-chip and reads it. If the code is correct, a pin on the lockout-chip goes low (in this case, to ground-potential) and the game starts. If the code is incorrect/missing, the pin goes high and the lockout-chip reboots the NES every second (does this sound familiar or what?). [I’m quite amazed my teenage self got this right, what’s happening is that the pin on the lockout chip is connected to the reset line of the CPU in the NES, effectively resetting it over and over again]
Now, usually the fix for games that doesn’t have a code (unlicensed games) or have a incorrect code (games from a other region, like USA/Japan) is to disable the lockout-chip.
But sometimes you get this error with games that are licensed and from the right region. This may be because of two things.
1) The connector is old/dirty and the lockout- and code-chips don’t connect properly
2) The lockout- and/or code-chip has gone old and isn’t working anymore
As you see, sometimes it might work chaning the connector to fix the blinking NES, because of the two-sided nature of the problem.
But luckily, one can ensure that the fix is permanent by disabling the lockout-chip.
That is done the following way:
First one must open the NES (see the changing-your-connector-part for a disassembly tutorial) and locate the lockout-chip. The chip resides on the main board of the NES, so it will take some disassembly to get to it. While one is doing that, it also an excellent opportunity to change the connector, they only cost a couple euros [back in 2006 they were like 5 € on ebay, today the seem to be going for 15 €, which might make it worthwhile to bend the pins out slightly instead], and it will keep you from having to open your NES at a later time. More on how to do this later in this article.
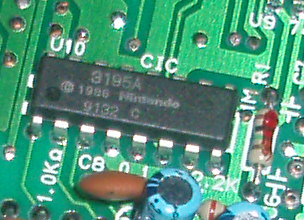
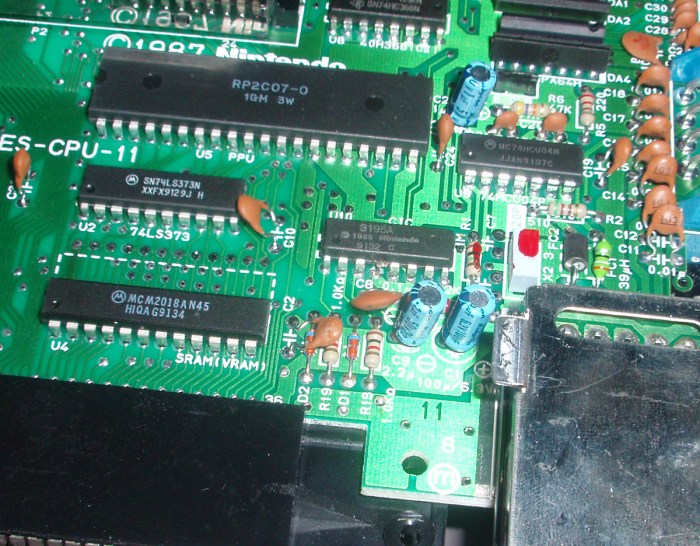
The lockout-chip is a Dip-16 chip, that’s a black IC with 16 pins mounted through-hole.
Here’s how it looks like inside my NES, made 1987
Depending on when your NES is manufactured, it might have various names one it, but here are the one’s I know of:
3193A, 3195A, 3197A
It seems as if Nintendo updated their chip in later models, but they all work the same way.
The idea is to make pin 4 on the chip to go low. This can either be done by just cutting off pin 4, or by cutting it and soldering a wire from it to GND (pins 11, 12, 13, 14 and 15 on the same chip are all tied to ground). I don’t really know if the wire makes a difference or not, but some people do it. It works just fine without it.
[here a decade of experience helps, it’s not advisable to leave pins on ICs “floating”, ie. not referenced to a voltage, so tying it to ground might be the correct way to go. That being said, it’s worked well for a decade after this mod without being ground referenced]
Here are some pics of how I did it, a more complete tutorial is to be found further downwards in this document.


That’s all. Simple, isn’t it?
Now, let’s look at the other blinking NES problem.
This problem has to do with the games and their playability. The thing is that if your connector is old and dirty, it will make the games fuzzy and hard to play. The fix for this is even easier than the previous one, you just have to change the connector and clean the contacts on your cartridges. First, changing the connector.
For this you’re going to need the following tools and parts:
- Small phillips-head screwdriver
- Small and narrow flat-head screwdriver
- Extremly small diagonal cutter, or a nail-trimmer
- New connector, get it from Amazon US or Amazon UK [links updated, my original source is long gone]
Here’s a pic of the tools I thought I would need
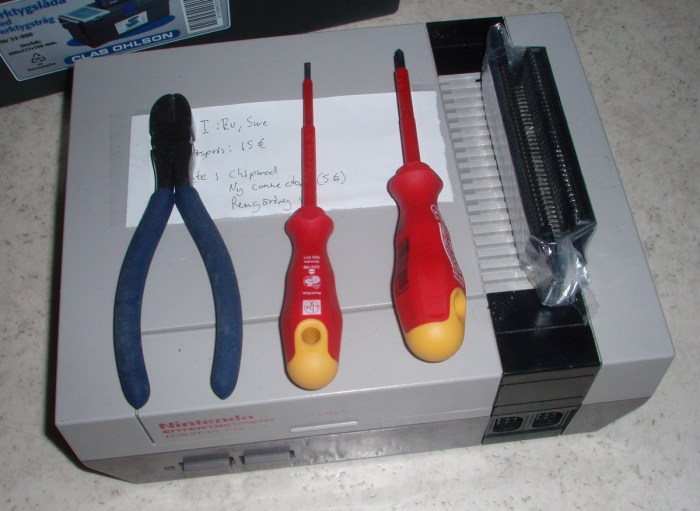
The cutter on the pic is way too big
Open up your NES by flipping it on it’s back and removing the screws that holds it together.
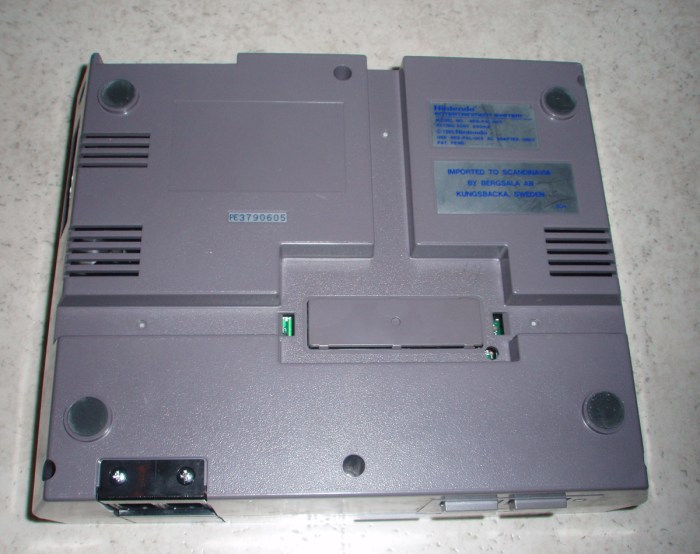
Note that on old NES:es bought second hand, some screws are usually missing. A 60W desktop-light is a valuable tool during this step
Now the top-cover should come loose. Flip it back up and remove the RF-shield.
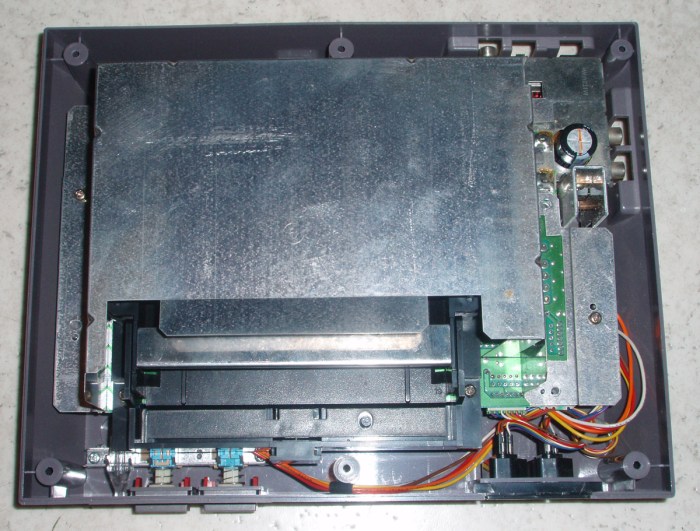
Next, remove the motherboard screws.
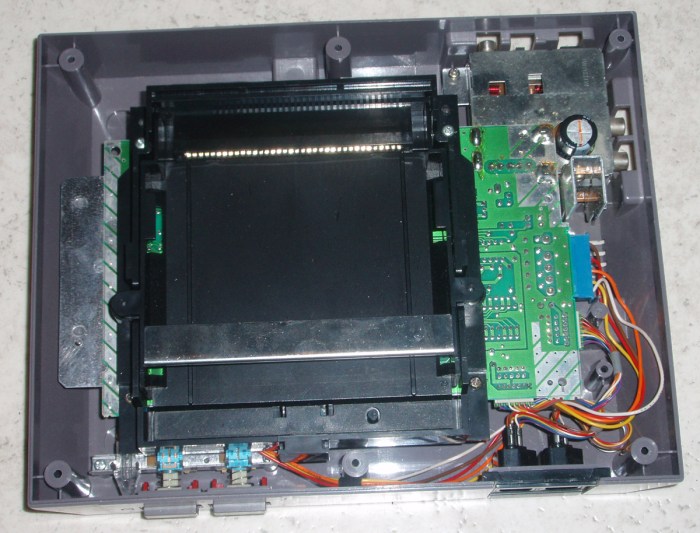
Now, gently lift out the motherboard and remove the cartridge tray. It might be a bit tricky to get it loose.


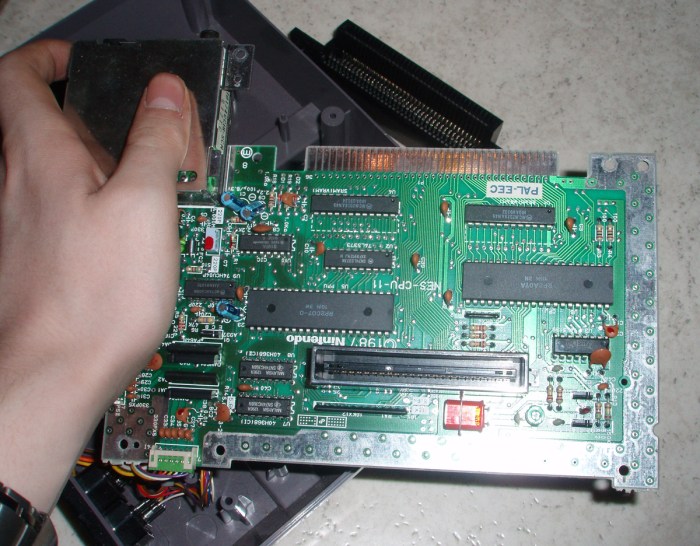
Now, flip the motherboard upside down to remove the connector.

Gently pry off the connector from the motherboard using your thumbs. Some force might be necessary since it might be stuck quite hard, make sure not to break anything!
Clean the contacts with isopropanol, ethanol or some contact cleaner (NOT acetone, it will melt the board!)
Install the new connector, some force might be necessary here as well. Make sure you install it the same way as the old one, since it’s totally possible to do so (been there, done that)

Before you assemble the NES you might as well mod it (as described above), since the lockout-chip might be failing as well.
First, you’ll need to locate the chip. The chip is circled on the image below.

Next, you’ll need to cut the right pin. On the image below, the pin has been marked with a red arrow.
![]()
Now, cutting the pin is quite tricky. I thought I might get away with that huge cutter displayed on the first image. But I ended up using a small pair of nail scissors.
Here the pin is cut. Now I just have to bend it upwards to make sure is doesn’t short at some later time.

Oops, it broke, but is doesn’t matter.
Follow the disassembly-instructions in reverse to get it back together again. You might want to test it when you get the RF-shield in place so you don’t have to fiddle about with the casing if something isn’t working.

Everything seems to work just fine!
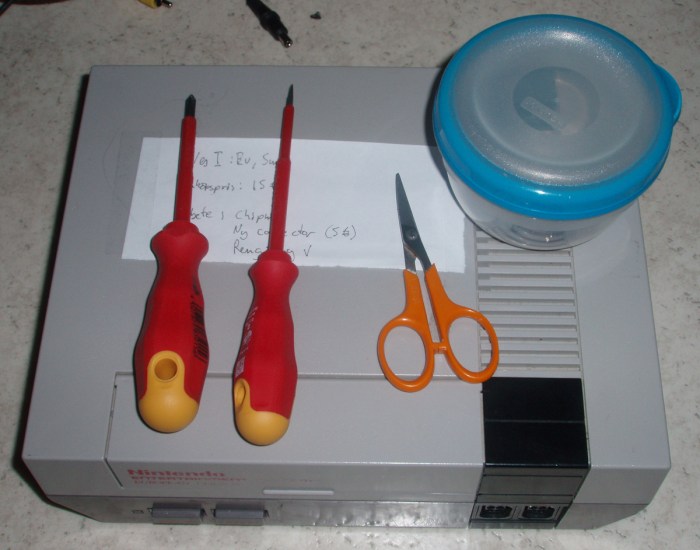
Here’s the tools I ended up using. The Tupperware-jar is an excellent tool for keeping screws!
Now you should have a fully working NES!
Categories: Tech

Leave a comment