Updating appliance VMs can be a bit of daunting process since they are all usually different. vROPS (VMware vRealize Operations) is no different in that regard, but it’s a quite straightforward operation when you get understand the process.
Step 1 – Downloading Update Packages
VMware used to provide a cornucopia of installation and update packages for vROPS, depending on if you’re running it on Windows, Linux or the purpose-made Linux-based appliance. In the 6.6 version, they have narrowed it down to just the Linux based installation, and the virtual appliance, making things a whole lot easier compared to earlier versions.
Since I’m upgrading the appliance, I’m going to need the OS and appliance upgrade packages.

Step 2 – Snapshot all the things!
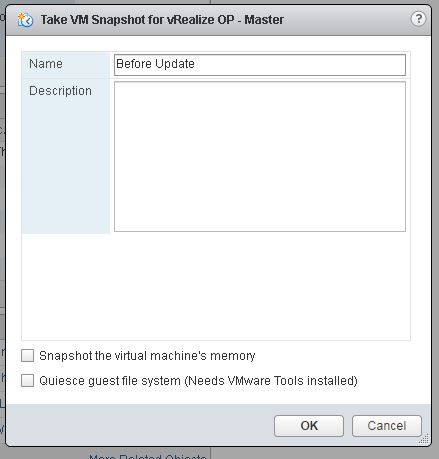
Next part of the process is to correctly snapshot the environment before we start patching it. According to VMware the correct process is to:
- Stop the vROPS environment
- Take a snapshot without memory or quiescing the file system
- Proceed with the update
So, first we need to stop vROPS. Head on over to http://<IP or name of vROPS>/admin/ and press the stop button!

Then head over to vCenter and take a snapshot of the appliance
Step 3 – Upgrade the OS
The next step is to upgrade the OS of the appliance. VMware doesn’t make this blatantly obvious, but it kind of makes sense to update the OS before the application when you think about it.
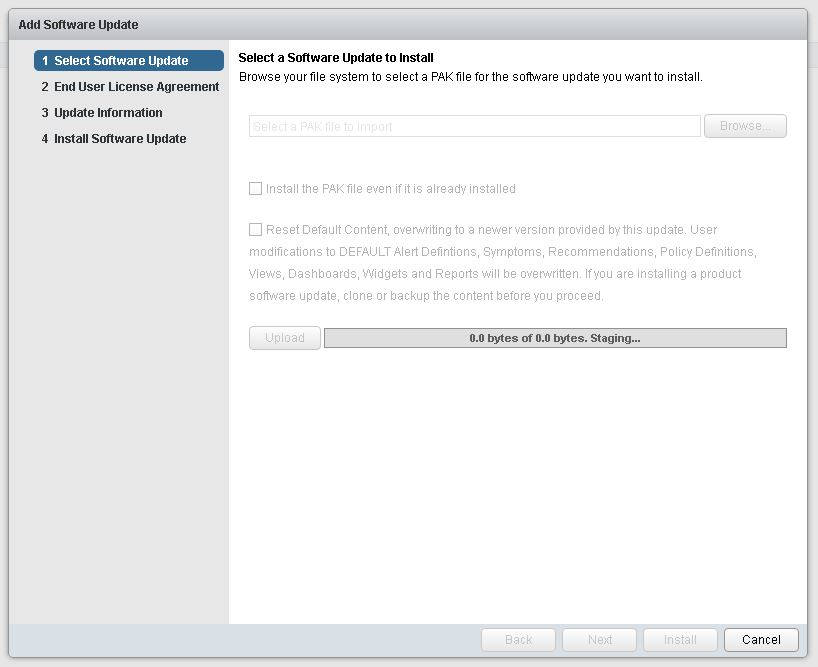
Select Software Update in the menu and select Install a Software Update…

Select and upload the OS patch (named vRealize_Operations_Manager-VA-OS-VersionNumber.pak). You should leave both options (Install even if already installed and Reset) unchecked. The upload is quite fast if you’re close network-wise to the appliance (do I need to tell you that you’re better of remoting in to a local machine and doing everything from there than trying to first download and then upload 3-4 GB of patches over the Internet?). What can take a while is something called Staging that happens after the upload, which can take 15-20 minutes in my experience per patch.
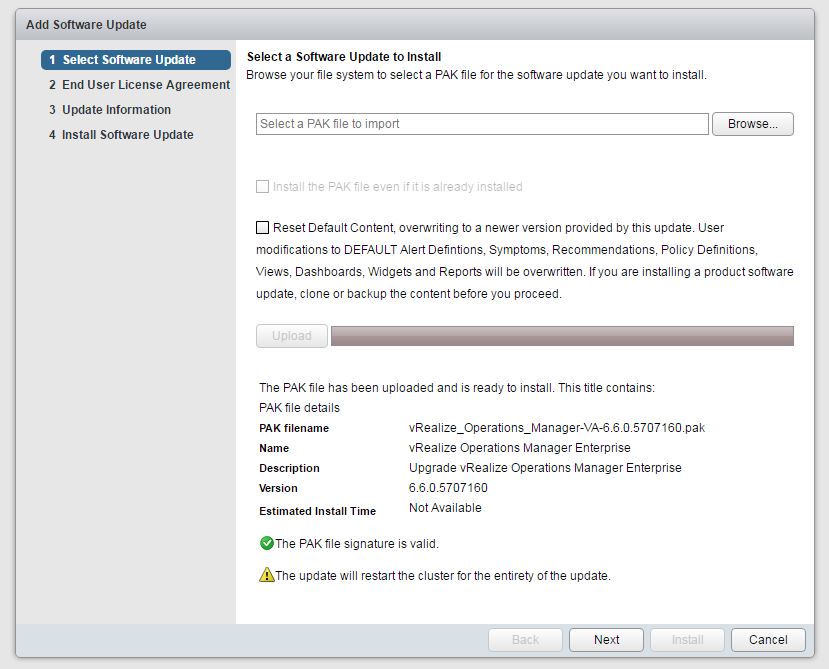
After half an eternity of doubting yourself and the gods over at VMware, you’ll be greeted with this wonderful page!

It’s then a process of NextNextNext™
The WebUI will throw some interesting errors in your browser when the appliance reboots, and the whole process takes a while (15-30 minutes on my system). When everything is done, the appliance should have rebooted, and the WebUI should report that the update was successful.
Step 4 – Update the Software
Next step is identical to Step 3, the only difference is the PAK-file you’ll be uploading
When updating anything, please read the release notes carefully!
You could also take a snapshot at this point if you want to do the belt and bracers approach, but I think it’s better to restore to a working state and redo the whole update process again.
Select and upload the appliance patch (helpfully named named vRealize_Operations_Manager-VA-VersionNumber.pak.). The upload and staging process are the same as in Step 3, and Staging takes forever this time as well.
Then it’s NextNextNext™ all over again.
At this point your VA should have rebooted and vROPS should be up and running again!

Leave a comment