So, for the last few years two things has really annoyed me when it comes to coffee; nobody seems to know how to make coffee properly, and the abysmal taste of most coffee here in Finland. Now don’t get me wrong, we really like our coffee in a quantitative sense here in Finland (we consume 12 kg of coffee per capita and year here), and most brewed coffee is very drinkable, but it’s nothing to write home about.
And most people doesn’t either know how to make coffee, or does it all wrong for various reasons. The “doing it wrong” is what really bothers me, or more precisely, people who are doing things wrong, and in their own mind have perfectly good reasons for doing so.

And here I come, with my little post trying to set the record straight. I’ll go through some common ideas and try to teach what I consider reasonably good technique, i.e. the bare minimum you need to do to get good coffee. There are ways to further improve these methods by additional steps and tricks, but they might be a tad too fussy for most people. And if you’re going to muck about a lot, why not use a press pot instead, the reason for using an automatic drip brewer (aka the garden variety coffee maker) is convenience, not necessarily quality.
I also want to note that although I’m going to present these methods as set-in-stone rules, in a very bombastic manner, there are probably other ways and better ways of doing things, but I’m not going to go into them. This is what works for me and there’s no point in confusing people with 57 different methods for making drip coffee. But, if you have ideas on how to do this better, or easier, do pop it into the comments below! Same thing with questions, chuck ’em in there and I’ll answer them as fast as possible.
A final note, as the title says, these steps work on most drip brewers, but since a) I have a Technivorm and b) the Technivorm is quite complex, I’ll add some stuff that’s specific to the Technivorm in-line with the rest of the guide.
The stuff you need to make good coffee is quite simple really, all you need is coffee, water, a way to grind the coffee and a way to a) heat the water and b) introduce it to the ground beans. But, due to the fact that coffee is a really complex substance, this is all but trivial.
Coffee
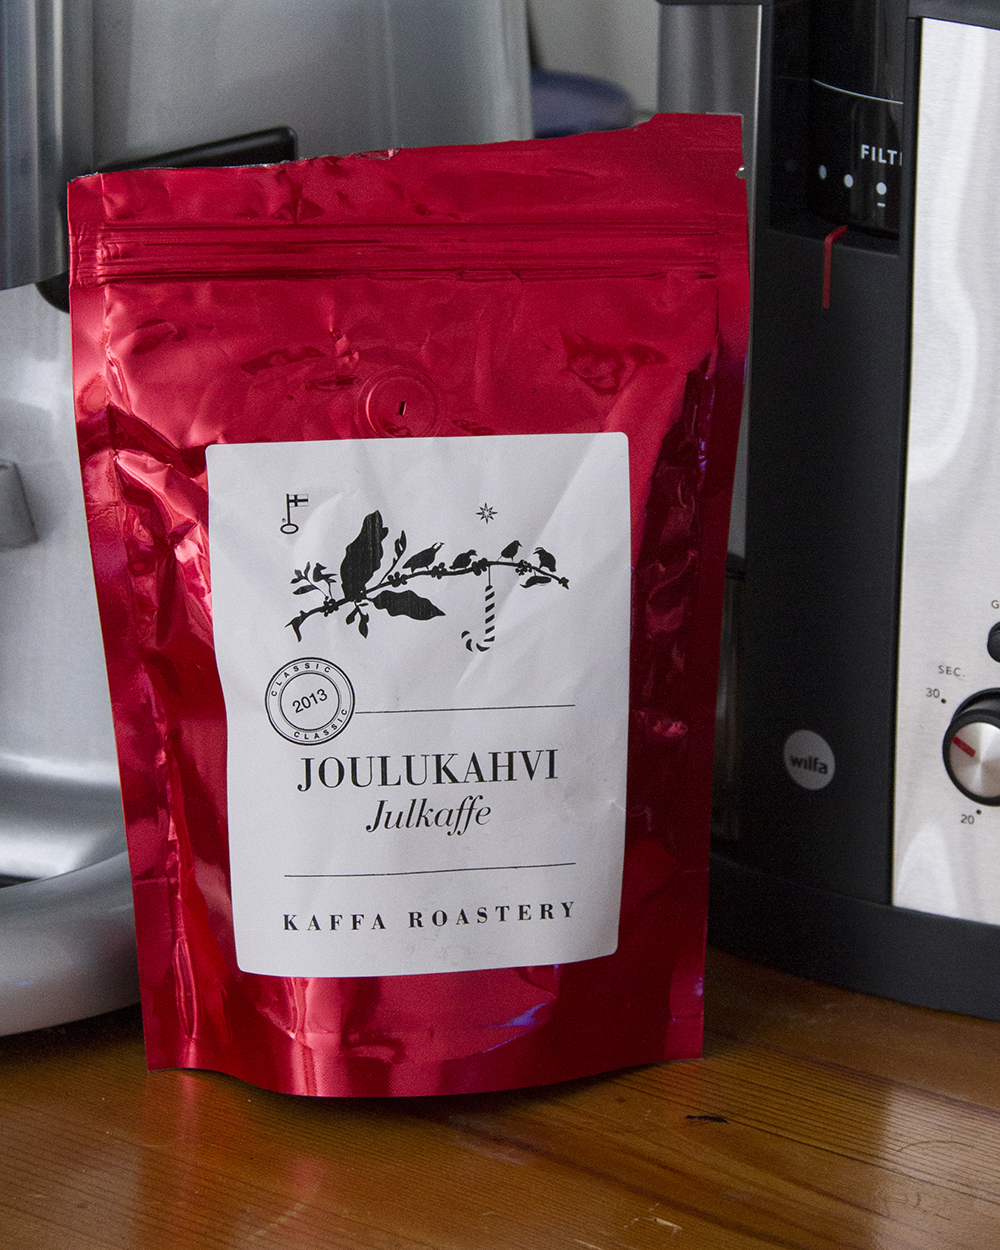
First, you need good fresh coffee. This means that no more than a month should have passed since the coffee was roasted, preferably, less than two weeks. This has to do with the fact that coffee contains carbon dioxide which starts to evaporate after roasting. For whole beans, this process takes about a month, after which they’ll be considered “stale”. But, the real kicker is that after you grind them, this happens in less then 15 minutes. This basically mean that anything that you can buy pre-ground is going to give you a bad brew. And if you’re lucky enough to find whole beans, most of them will be stale. Some companies, like Illy for example, try to get around this by packaging the coffee in nitrogen purged cans or something similar, but that means that you have a very short time to use the beans before they go bad, a couple of hours at most. So, local and fresh is the best way to go. In the picture above, I’m using Kaffa Roastery Christmas Blend, which is local to me here in Helsinki (very nice coffee as well).
Grinder

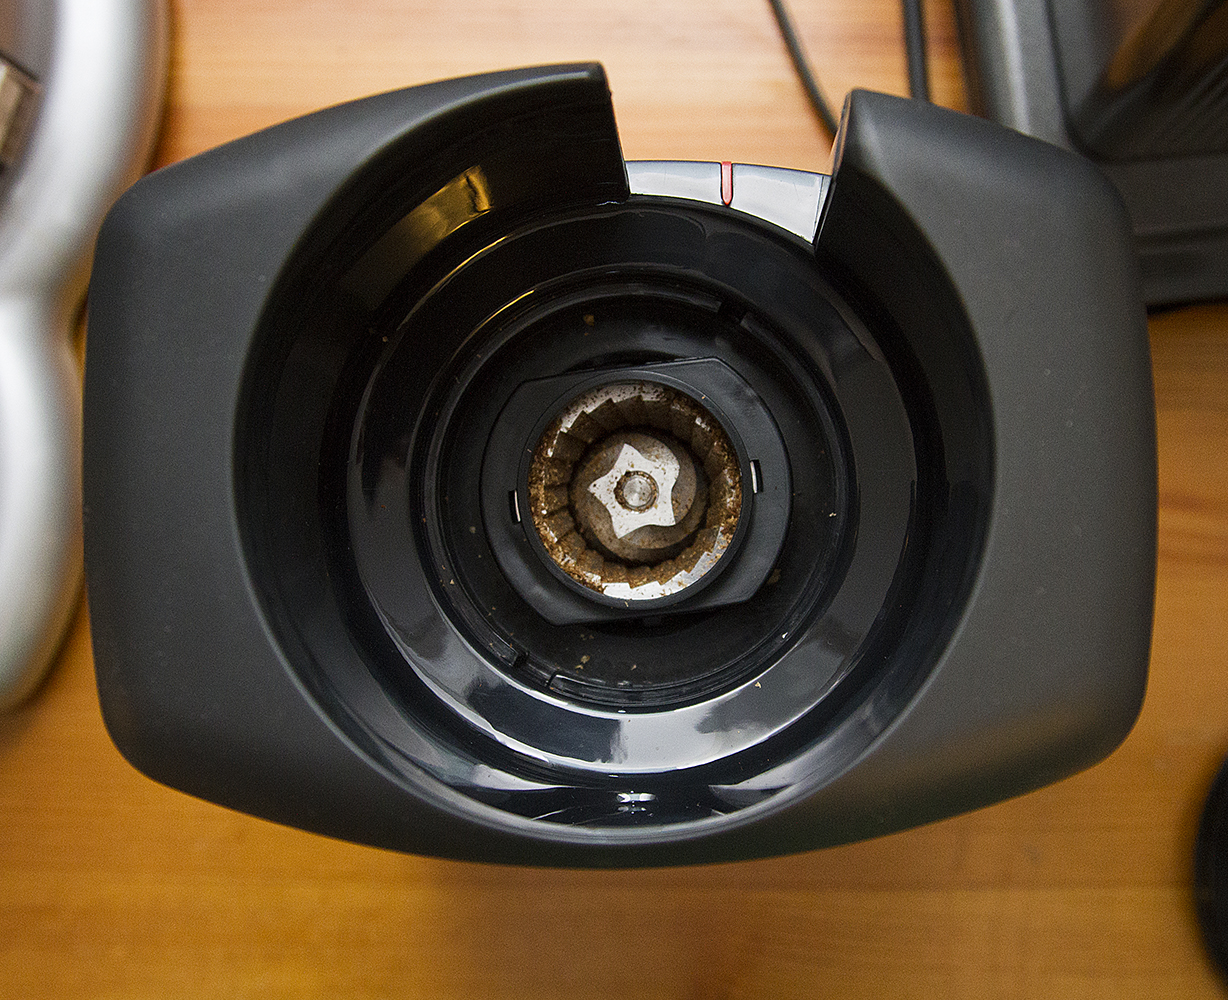
The second most important factor is the grinder. Because of the reasons I mentioned above, you need to grind the beans just before you start brewing. And you can’t really use any kind of grinder either, it needs to be a so called burr grinder, which is a grinder with toothed millstones that crush the bean between them. This produces a uniform particle size, which is crucial for even extraction. The other kind of grinders, the blade grinders (which look like a scaled down blender), just makes a mess of the whole thing, and you can’t reproduce the same grind size two times in a row. Just avoid them altogether. The price of proper burr grinders have also dropped a lot in the last few years, so they aren’t even that more expensive to buy. Above you see a picture of my new and shiny Wilfa grinder, which has proper conical burrs and is generally really nice. It also costs less than 100€ which really boggles the mind. I’ll post a review at some point when I get around to it. Below is a picture of the aforementioned burrs, a tad small for any serious use (i.e. espresso, that’s what the Macap M7 next to it is for) but works fine for home use.
Machine
You might notice that I put the machine last in this list of things that you need to make good coffee, and that’s because it actually matters the least bit. Different machines give you different end products, and some might even give you bad coffee no matter what you feed them, but without proper coffee and a proper grinder, all machines will give you bad coffee. For this guide we’re going to use a drip brewer, a Moccamaster to be exact.
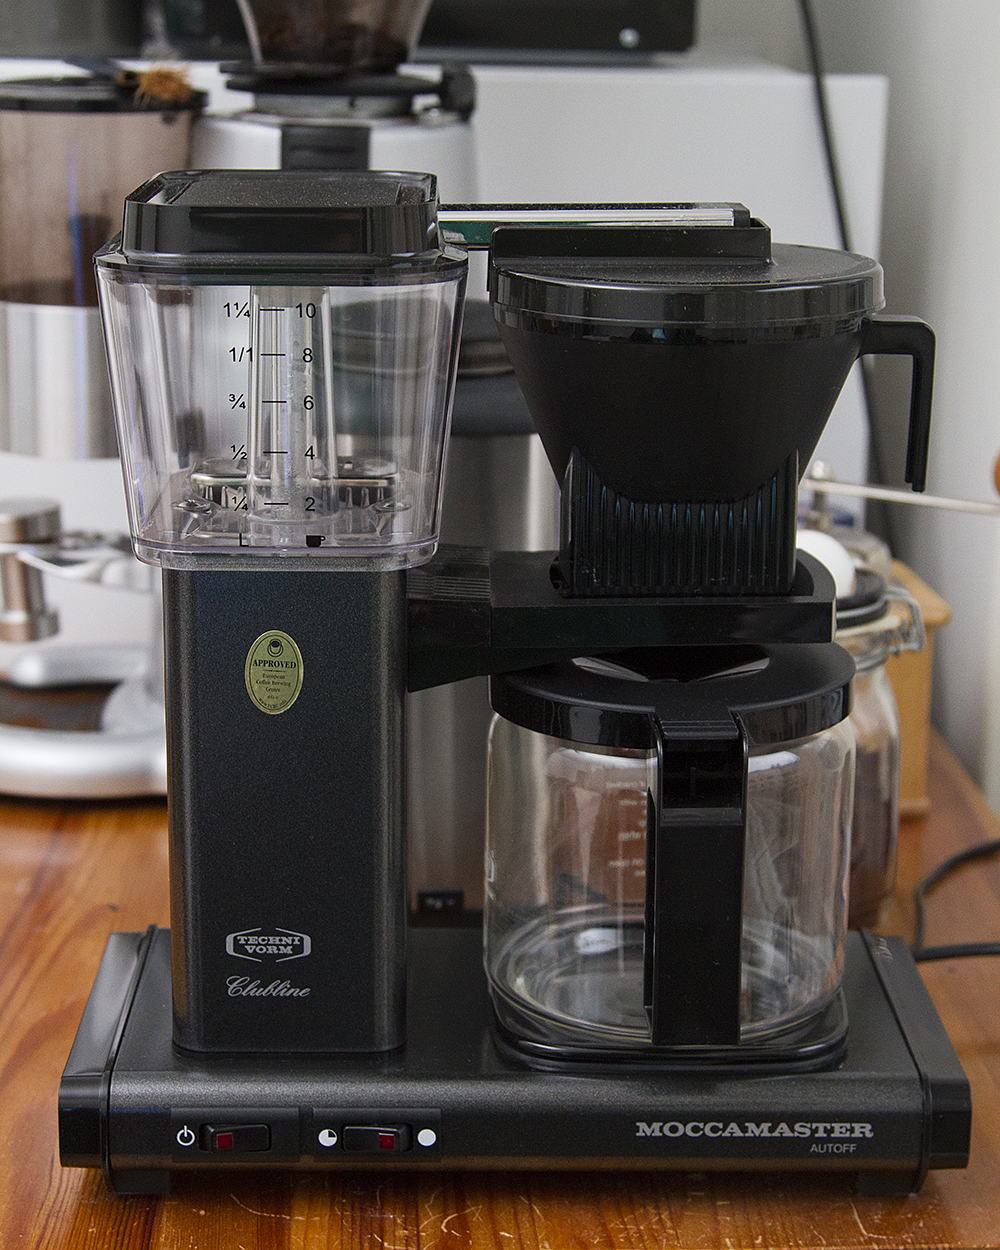
These are quite nice machines, and one of the few automatic drip brewers out there to be certified by the SCAA, which is quite an achievement (there are about 4 other brewers that the SCAA see fit to make a cup of coffee). They are also hand made in the Netherlands and very robust, but that also makes them quite pricey. Anyhow, good but expensive brewer, let’s move on.
Procedure
First, we’re going to prepare the materials and the machine, and after that we’ll grind the beans and finally brew the coffee. Since the coffee starts to loose carbon dioxide as soon as we grind it at a tremendous rate, we’ll leave that step to just before we start brewing.
First, we need to measure the right amount of coffee. The rule is 6,5% coffee by weight, compared to the amount of water you have. That equates to 65 grams of coffee for every liter of water. This is a starting point, and some people may want a tad bit more or less for a specific coffee. The key point though is that you do not want to deviate from this more than 10 grams per liter either way. If you want your coffee stronger or lighter, choose a different roast level (darker bean equal stronger coffee), do not just add more coffee to make up for a too light roast, or vice versa. I’m going to brew a liter, and therefore I’m going to use 60-ish grams of coffee. And since the only way to know how much coffee you have is to weigh it, we’re going to use a scale.
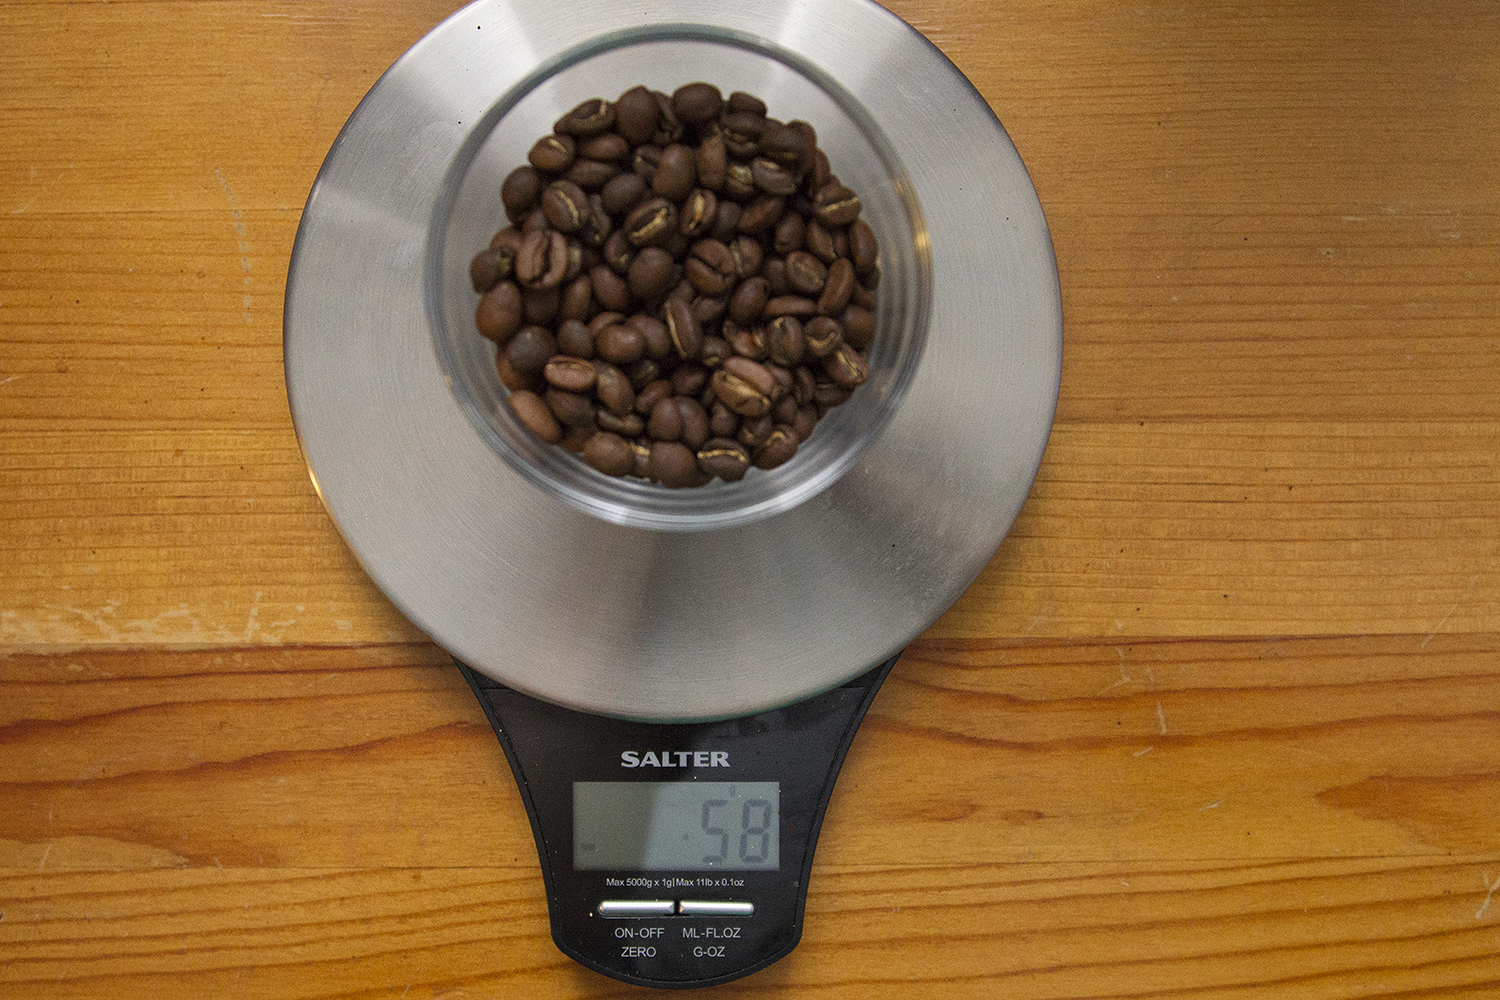
The reason I say 60-ish grams is because I took so long to take this picture that my scale had ample time to change it’s mind from 60 grams to 58 grams. But that kind of precision doesn’t really matter, and my scales are rubbish anyhow. What matters more is that you get a ballpark figure so you know where you’re at and where to go if you want to change anything. This also makes it easier to hit the same sweet spot later if you brew turns out perfect.
Next, we’re going to do the same thing with the water, again measuring it on the scale (which in my case turned out to be completely unnecessary, but we’ll get to that). One millilitre of water weighs one gram (since the density of water is 1 kg / m^3), so you can just read the grams as millilitres. Some scales allow you to change between millilitres and grams, but that’s a bit moronic since the scale doesn’t have any idea of the density of the liquid being measured, and as such will only read accurately for liquids with a density similar to water.
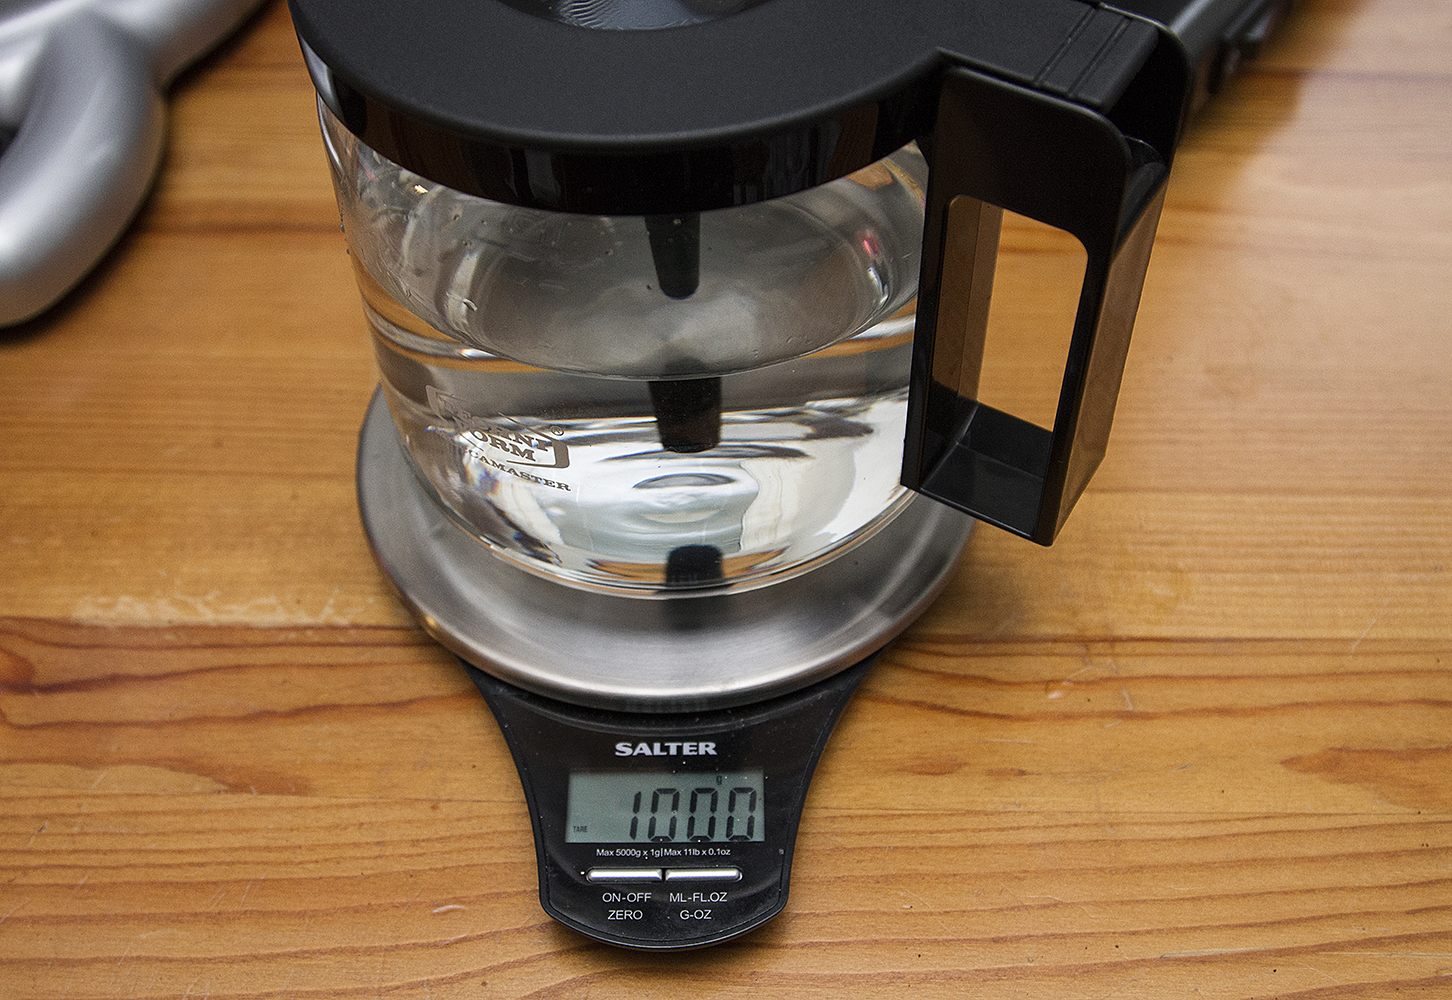
The reason why this was a bit of a futile exercise in my case is because of the bloody Technivorm, since it’s quite nicely made, has a scale on the reservoir actually correlates to reality, so if you fill its 1,25 litre reservoir to 8 out of 10 cups, you’ll actually have exactly 80% out of 1250 ml, i.e. one litre. The sodding bastards that made it even put a helpful 1/1 litre mark there to tell you this fact if you’d bothered to look closely enough.
After you get over the existentialism of the water tank and stop sobbing in the corner, we’ll move on to the filter assembly. Drip makers use all sorts of filters, but since this is supposed to be the bare minimum tutorial that it is, we’ll stick to the paper ones. First, you’ll need to get a good quality filter, I use Melitta, but I’ll let you figure out what’s best in your local area. With better filters you get less nasty stuff in the paper itself, and somebody probably spent at least 5 minutes thinking about how coffee passes through it. Don’t ask me about the differences between unbleached or bleached, I really couldn’t tell you. Unbleached is probably more eco-friendly, but if you’re a proper tree hugger, you wouldn’t even bother with paper and go straight for the reusable mesh filters (which probably gives you a better tasting cup, but also a bit of health problems according to some studies). Paper filters are however biodegradable, so the impact on the environment, your health and your karma shouldn’t be that great any which way you choose to go.
Update: I’ve noticed that a lot of people searching for the correct paper filter size for the Moccamaster end up here, so let me help you; most Moccamasters take a 1×4 filter in Europe and a #4 filter in North America. If you were wondering, yes, a 1×4 filter is exactly the same size as a #4 filter.
When you manage to get the filter out of the package (another home exercise), you’re going to do what your mother or father probably didn’t teach you as a kid, which is to fold the corners of the filter, as such:
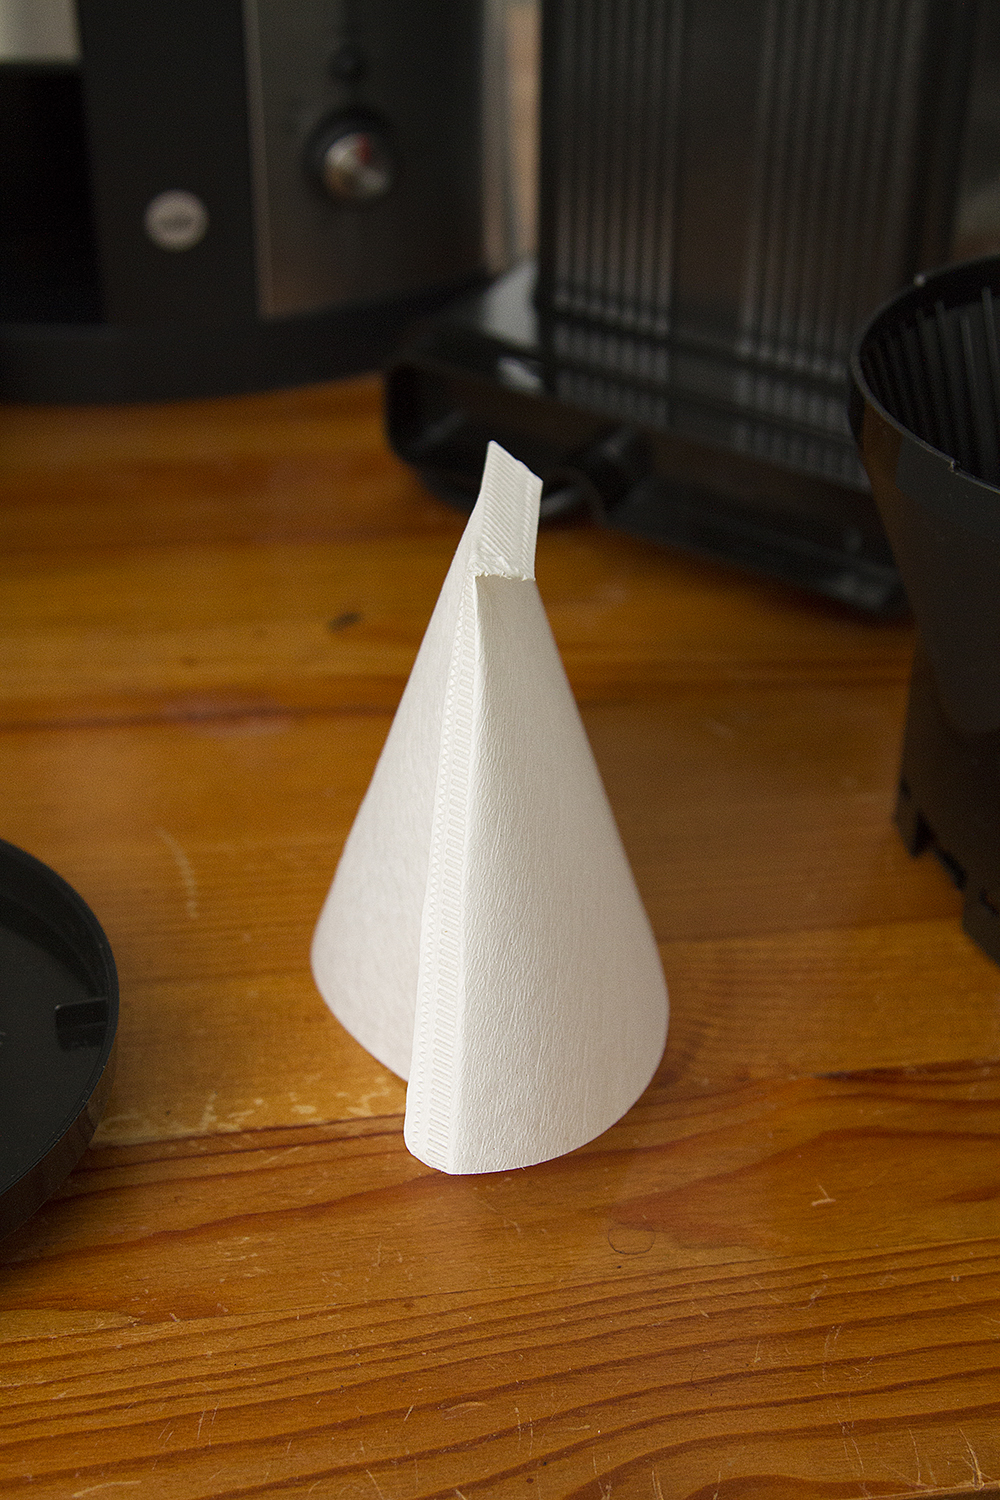
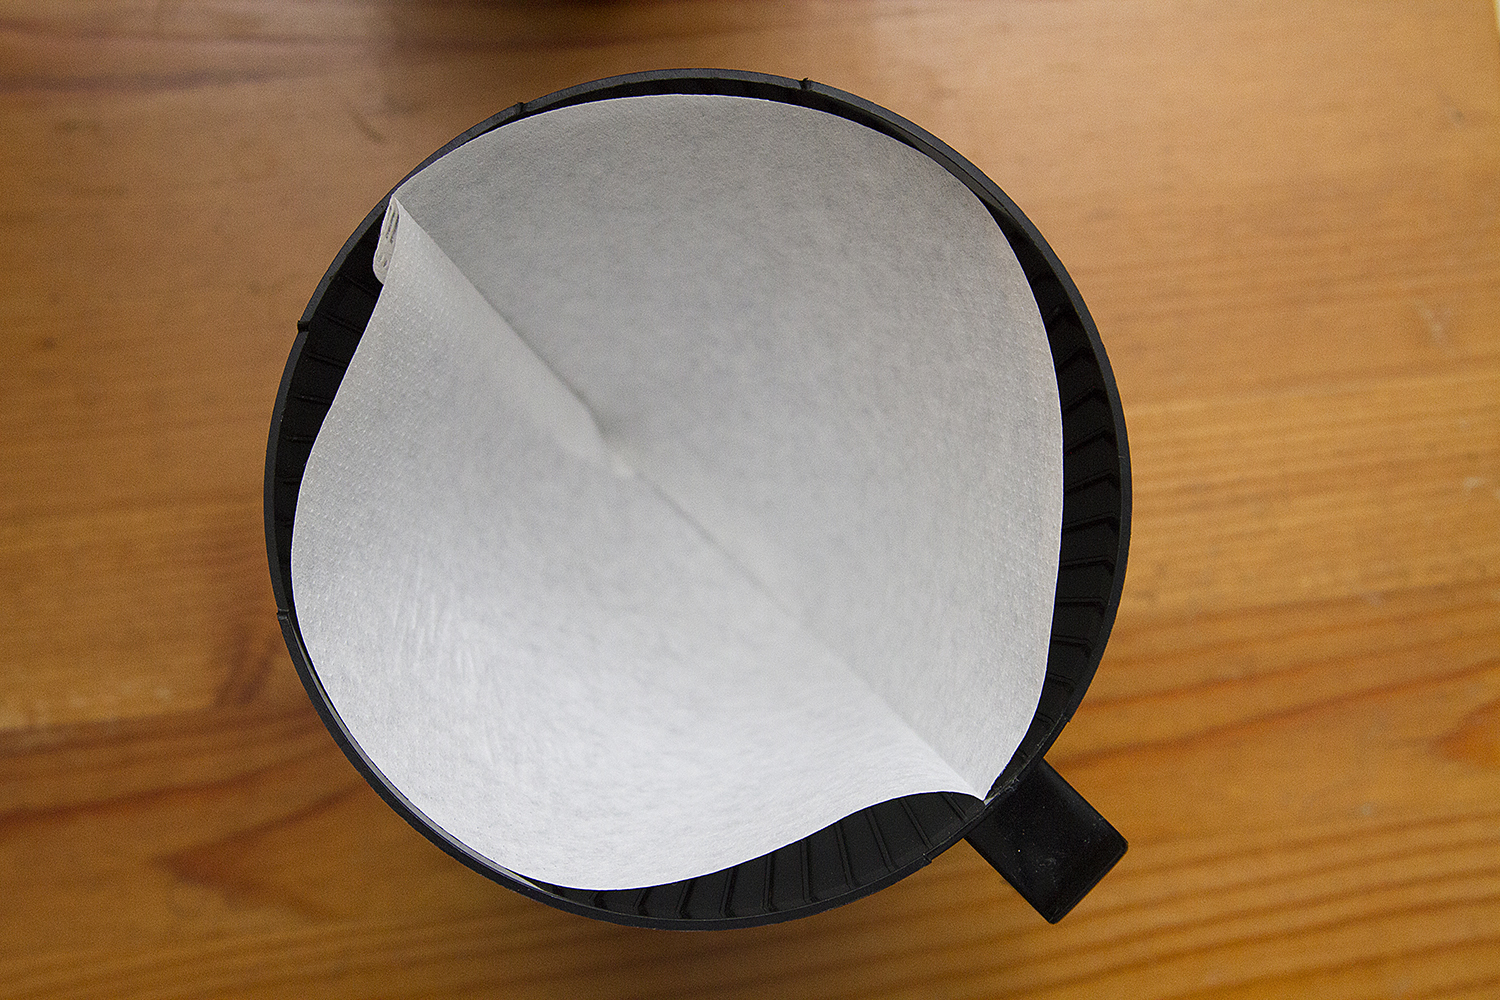
As you see, you fold the side seam to one side, and then the bottom seam to the other side. Very easy, and not a whole lot of extra work. The idea behind this is to seat the filter properly in the holder, as can be seen in the following picture:
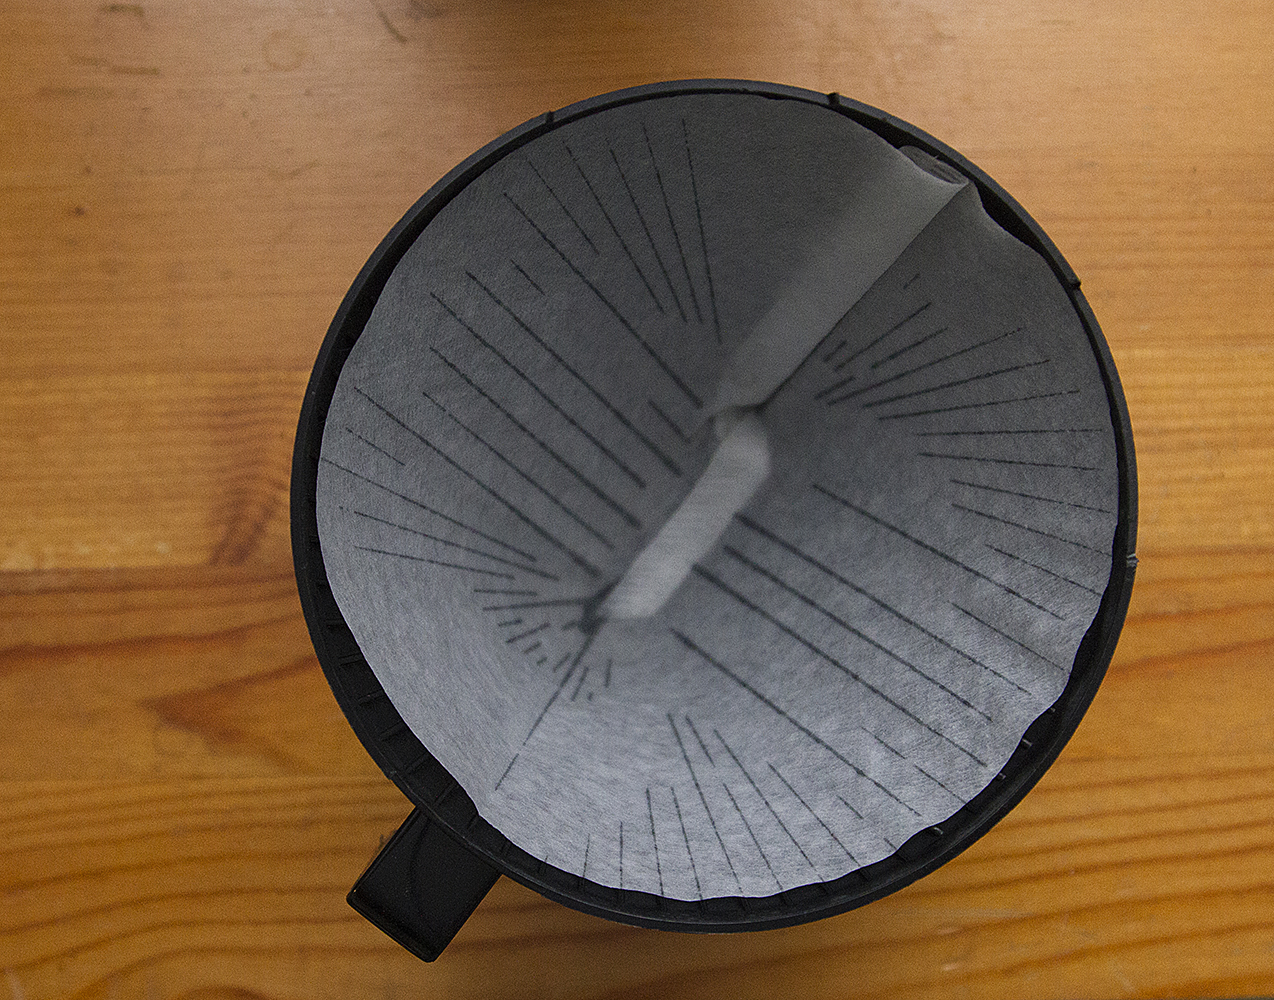
Next, we’re going to rinse the filter with hot water, to remove some of the nasty paper taste that some inferior filters might give off, and also to make it strain the finished brew more uniformly. You have two options here, either you just run some water through you machine and dump it out, which has the added benefit of heating the whole machine up to brewing temperature, or you just rinse it through with boiling water from a kettle or something. The first option is probably better, but the kettle method is what I used here since it’s quite a bit faster.
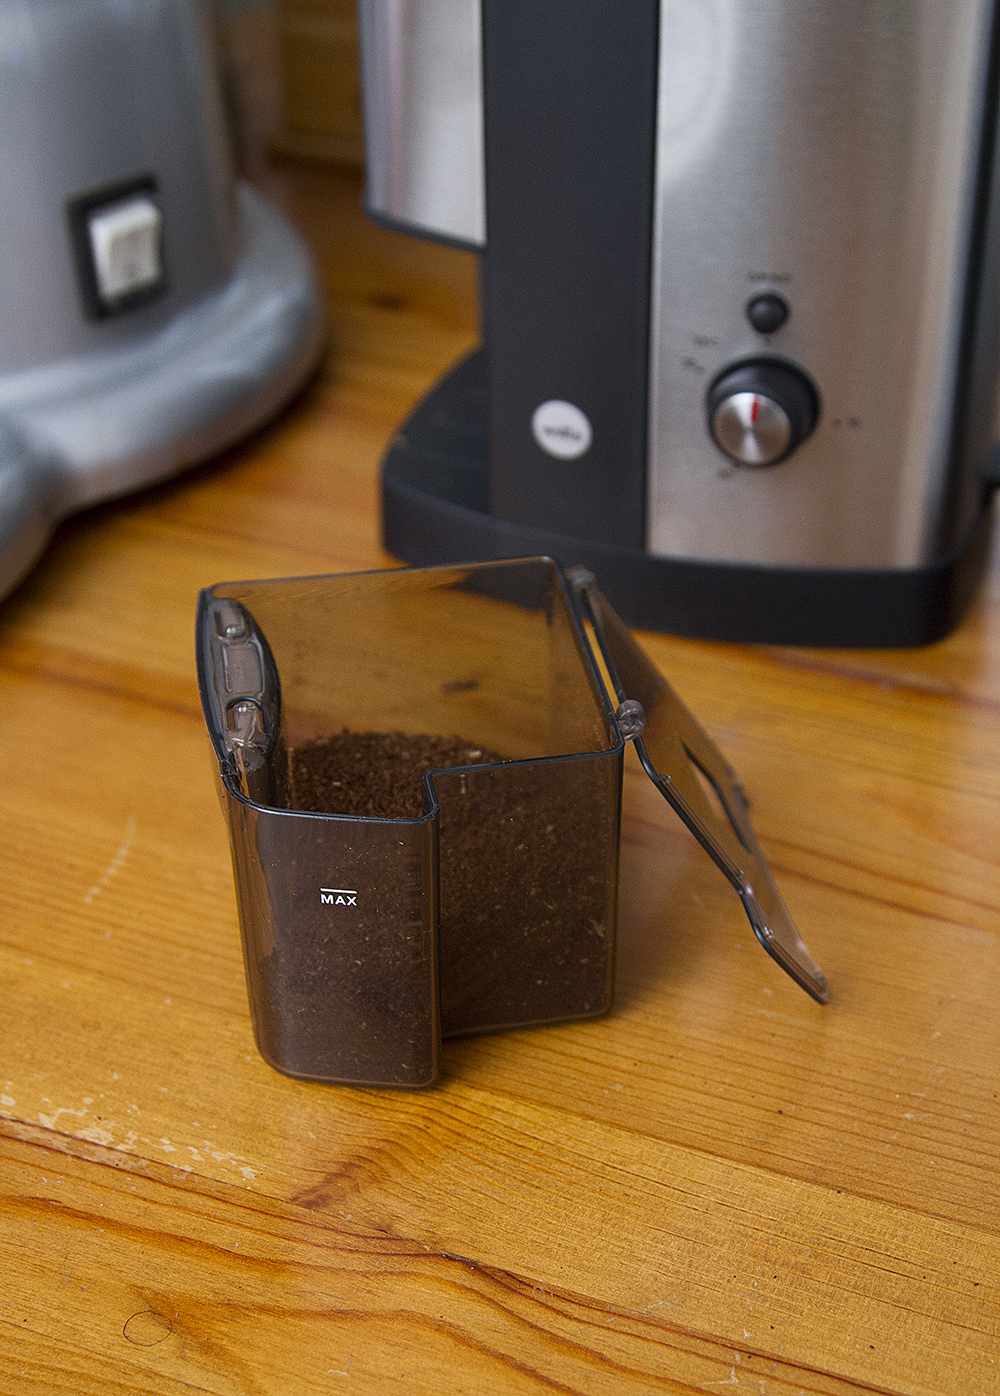
Now we’re ready to chuck the aforementioned beans in the grinder, and grind them to a proper coarseness. The easiest way to get this right is to either look at some store bought pre-ground coffee (the only use for it in my opinion), or be luckily enough to have a grinder with set points for drip coffee. Anyhow, in a vain attempt to describe it, the correct coarseness is a tad coarser than granulated sugar.
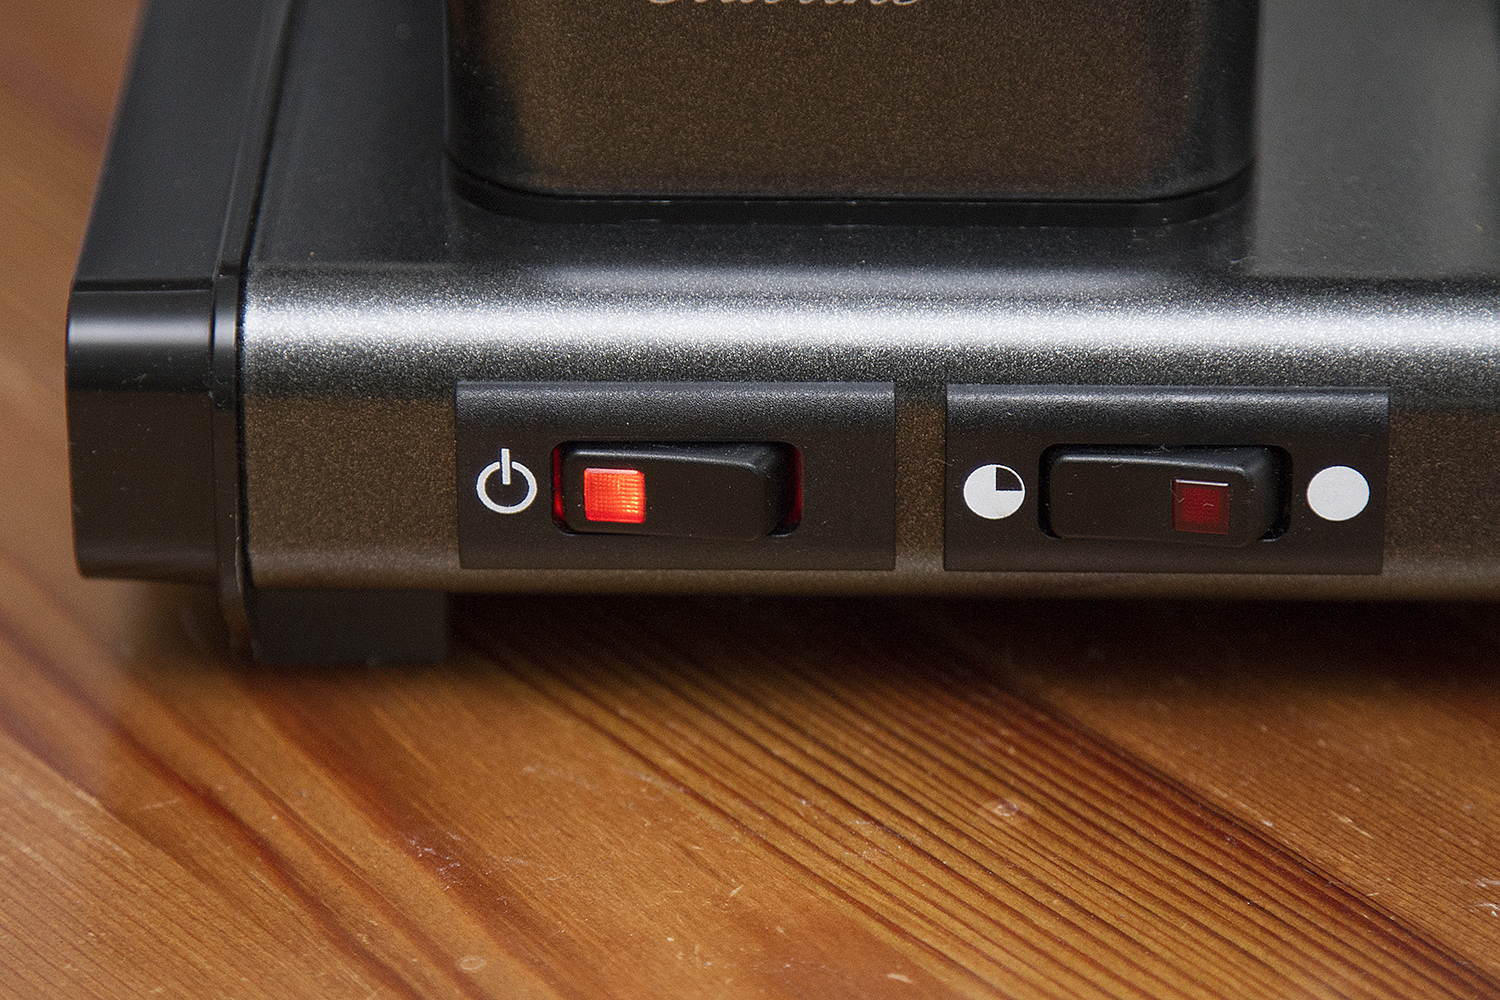
There we go, chuck that in the filter holder, and assemble the whole shebang. Now we have everything in the machine and are ready to go. But, before that, the second and final thing specific to Technivorm brewers. Notice that on the side of the machine there are two switches. One starts the machine, but the other, the pac-man / no pac-man one, is not as self-explanatory. This is the hot plate setting, and basically it’s either hot or very hot. This button should never be on anything else than the hot setting, i.e. pac-man mode! The reason is that the hot plate already slowly destroys your coffee as it sits there slowly stewing, but on the very hot setting it will cook the living daylight out of it before it’s done brewing. To really push this fact home, here’s a picture of the switches in the only allowed mode while brewing! The very hot setting might do as a stove for frying eggs in a pinch.
After that, hit the ON button, and watch the coffee brew!

You should aim to drink the coffee as soon as possible, and if you need to save it, transfer it to a thermal carafe (or get the Moccamaster with the thermal carafe instead of the glass jug, though I’d personally go with a separate thermos, it’s easier to clean). Also, technically, these up-scale brewers work best at max capacity, so you should aim for that as often as possible. If it’s better to brew a small quantity and drink it immediately or brew a lot and have it sitting in a thermos all day is something I really can’t tell you, but you’re welcome to try it out and post your findings in the comments below.
That’s all folks, and as I said the coffee and the grind matters the most, so try it out on your own machine before running for the shops in search for a better brewer. That said, if you have a really horrible brewer that spews piping hot boiling water right at the grounds, you might have some problems getting the most out of the coffee. Experiment and see where it gets you.
There are also more tricks you can use to further improve the quality of your coffee, like stirring the coffee in the filter while it extracts, but in my opinion you might then just as well move on to another method, like the french press (I really like the Bodum Chambord 8-cup) or a manual pour-over cone, since that level of fussing defeats the point of the machine altogether, and it’s easier to stir in a more accessible pour-over cone anyhow.
Categories: Coffee

Thanks for these tips. The filter assembly was new to me 🙂
As I wrote, my mother taught me the folding trick two decades ago, and I’ve never actually seen anybody else use it, but it seats the filter really nice in the filter cone. If it does make the coffee any better I really can’t say, but at least it satisfies my OCD. 🙂
I, too, have never seen anyone fold the filter, but I started fold the side when I started using the Clever pour over contraption.
It wasn’t until 2020 that I started folding the bottom as well.
My mother will be thrilled to hear that she’s managed to improve somebody else’s coffee making experience by proxy!
This recipe fulfills my life long quest. It made a great cup of coffee (two days in a row). George Alfred
Thanks, I’m really thrilled that you liked my little write-up. I’ve been reading up on coffee related things all over the Internet for years, and I thought it’d be nice to have a complete collection of all the necessary info in one place!
Just purchased a Technivorm and was looking for appropriate grind size recommended. Thanks for the tips!
I enjoyed reading your article. I’ve read that some of the same models are a little different in the US compared to those available in Europe. Technivorm’s thermal carafe, in the US anyway, is not glass lined, so those of us who can discern a metal taste might want to transfer the coffee to a glass lined carafe after brewing in a glass carafe. That said, there are a few blind taste tests on the Internet where baristas taste one hour old coffee that was made by a Technivorm, one from a thermal carafe, the other from a glass carafe that has been sitting on a hot plate. Surprisingly to myself and the baristas, the hot plated coffee was deemed superior to the coffee from the thermal carafe. It’s a moot point in my opinion. I prefer to make another pot of coffee rather than drink coffee that is more than a half hour old. Yes, I am a coffee snob!
Hi Paula, glad you enjoyed my ramblings! 🙂 You wouldn’t have a link to that any info on that blind tasting test? It would be interesting to see! I didn’t know about the difference between the US and EU versions of the thermal carafe models, but then again I think I’ve only even seen one of those once in my life.
I very recently got the Moccamaster and although I love using this machine, I find that the coffee generally is not very hot. I drink my coffee with some milk. I don’t actually like piping hot coffee. The problem is that the coffee gets luke warm very quickly.
Do you have any suggestions to keep the coffee much warmer, although not piping hot?
Hi Harvey,
I’ve never had that problem with the 2 one’s I own, both produce hot enough coffee for my tastes. Have you tried switching the hot plate setting to the higher setting? On most MM machines, the lower setting is more than enough, but that might vary from machine to machine. You could also check that the hot plate actually gets hot while the machine is on, it should feel like a stove when you put your hand close to it.
Harvey,
Are you running a cycle of water thru your Moccamaster before you actually brew your coffee? I’ve found that brewing coffee in a “cold” Moccamaster results in coffee I can drink immediately. Brewing coffee in a “hot” Moccamaster results in coffee that is so hot I have to wait several minutes before I can drink it. The two techniques also produce different tasting coffees.
I do not mean to pee on your parade, but as far as I can tell, you do an important mistake in this guide. It is absolutely essential for a good brew to use fresh, unsullied water. In your picture, you measure the water in the can where the cofee drips. That is a very bad idea, because there will always be some essential oils left in the can, and using the can to pour water makes the cofee bitter.
Hi, thanks for the comment! You’re absolutely right, without resorting to extreme measures, like cleaning the pot with ether, you’ll always have some residuals in the pot even after washing, which could carry over into the fresh water. That being said, the effects are miniscule on the end product compared to all the other variables such as fresh coffee, grinding the beans before brewing etc. I’ll update the guide accordingly though since I’m a firm believer in controlling as many factors as possible!
Cheers,
Sebastian
Give Oxy-Clean a try for cleaning the thermal. carafe. The results are impressive – the brown coating simply floats to the top.
Sebastian,
Yours is a nicely written, not too OCD discourse on a very subjective subject. I’m of late becoming more aware of the complications of coffee brewing. It’s consumption has become comparable to fine wine. My parents (i’m a boomer) drank perked Folger’s. I’ve gotten to the point of questioning the freshness of Starbuck’s whole bean purchased at Von’s. Hence today’s arrival, via Amazon, of my
Moccamaster 79212 KBTS; and the demize of my heretofore valued and still operational
Cuisinart 1100.
Keep up the good work!
Mark
Hi Mark!
I do try to keep the OCD somewhat at bay while also trying to not skip any details, I personally hate it when guides glance over specific details that they deem unnecessary.
As for your start in “proper coffee” as some like to call it, my top advice is not to give up! It takes a lot of interest and time to get it right, especially when you get over the first few months/years of “everything tastes amazing – this is amazing!” 🙂 Also, don’t be afraid of making drastic changes if you’re not getting the results that you want, when I started out I generally always made very small tweaks, which made it hard for me to see any noticeable change in the end product, and noticing this cause/effect relationship between the problem you’re having, what changes you did, and how that changed the coffee in the cup is the most important skill you’ll get over time. And as a friend once said, don’t be afraid to make mistakes, after all, it’s just coffee! 🙂
Best regards and good luck,
Sebastian
Everything seems spot on about what you wrote si this a definite starting point. Weighing beans. Never thunk of doing that. ☺ Wife and I do like strong coffee so maybe 70 grams…90! Joking.
Always just looked at the filter basket, filled it to just a wee bit less than 3/4 and off I went. The ground beans soak up a bit of water too. A lot depends on the beans too for some reason. I purchased some and it brewed like a tea! Weak. Tasty but weak no matter how much grounds I put in that basket. Oh well.
Thanks again.
Hi Brandon! Glad you liked it! Some coffees need a bit more than 60 grams, but it’s a good starting point. If you have a coffee that brews weak, try grinding it finer instead to increase extraction!
Cheers,
Sebastian
Thank you for this detailed how-to for the MM. I’ve been doing it ALL wrong: pre-ground beans, no measuring of anything (just guessing). I have the office style MM which requires flat filters but the ones I’ve found at Staples don’t really fit; I have to moosh them and sometimes they cave in during the drip process. My husband likes a really strong cup of coffee and I’ve been using lots of pre-ground coffee grinds to appease his taste buds but find that’s apparently wrong, too. I’m going to buy a burr grinder. Thanks for your greatly appreciated report.
Glad you liked it! I’d go out and try to find some nice high quality filters first, if they don’t fit the holder properly you’ll be chasing your own tail when it comes to problems with underextraction, overflowing etc. Getting a grinder is a great idea, hope you have good luck with it!
It’s important to note the grind size will change depending on how much coffee you are brewing. Learned this by experimenting that with a Baratza Encore the grind size is 20 for 500ml and 25 for 1 liter. Because you can’t control the rate of the extraction with this cup it needs more coarse grind as the amount changes. I’ve experienced real smooth coffee at 500 ml but overly strong and bitter at 1 liter using the same grind size. After making the tweak and timing the brew of when the water drips to about 4 minutes 30 seconds. This seems to be a happy place. So if you are not happy with the taste go a bit more coarse!
Yeah, grind size is the next level after this guide, I really debated with myself on if I should try to explain it or not, and I elected to leave it out for now, as it only works if every single other thing is perfect. But you are perfectly right, the ideal grind is not the same for a filter 33% full and one that’s filled to the brim. Basically you’re controlling the brewing time by altering the grind size, allowing water to flow more or less easily through the coffee.
Do you know if the technivorm filters drip slower than the Melitta? Ive been using the Melitta, but had some technivorm that came with the machine. When I tried them they seemed to brew much slower than the Melitta. I guess I could try timing them, but I’ve run out.
I have no idea actually, I can’t remember how the Technivorm ones behaved. It shouldn’t matter that much though, just adjust the grind size to compensate (finer filter, coarser grind) so you get the flow and extraction you want.
Cheers,
Sebastian
Thank you Sebastian. This guide was very helpful. For most of my life I have been a tea drinker, but recently decided I would give coffee a try again. I didn’t care for it when I was younger (I also didn’t like mushrooms and beans), but one’s palate and tastes change with age and experience, so I figured I would give it another shot. I found I do now enjoy a good cup of coffee (and mushrooms and beans too). 🙂 I purchased a Technivorm Moccamaster KBG and a Baratza 586 Virtuoso grinder. The equipment makes a world of difference in preparing a quality cup of coffee, and they are fun to use! Thanks again.